I found a recipe on another blog for potstickers that were easy and had the ability to freeze ahead for a meal later. I planned it all out and purchased the items I did not have and began making the recipe. I must have read it wrong, I thought, because it was all wrong! So, loath though I was to do it, I made the recipe exactly once again. Guess what? Turned out all wrong again and tasted terrible. I tried again making changes and kind of stumbling along – and it turned out great. Third time’s the charm!! There won’t be any link back because I did not use most of the blogger’s information other than this: They do freeze well and may be cooked the same way whether frozen or fresh. I made sure to take pictures of all steps so you could see how you can make it too – instead of leaving you to guess because there are several steps involved. Let’s go!
Potstickers
Ingredients:
½ lb. ground pork
1 ½ Cups finely chopped cabbage
1 Tablespoon grated ginger
1 Tablespoon very finely chopped or grated fresh garlic
1 ½ Tablespoons Soy Sauce
1 Tablespoons Sesame Oil
Directions:
Mix all ingredients in a bowl, cover and put in fridge until you are ready for it.
Ingredients:
2 Cups all-purpose flour
1 Tablespoon salt
1 to up to 2 Cups boiling water
Directions:
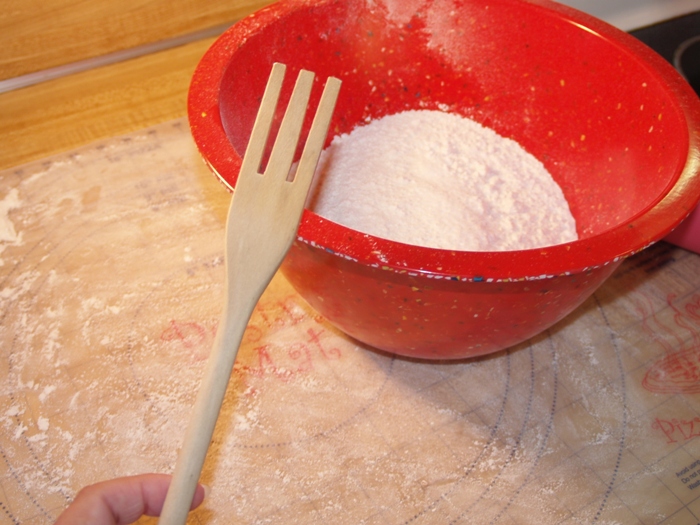
Pour boiling water into bowl with flour by ¼ Cups using a wooden utensil – this is mine:
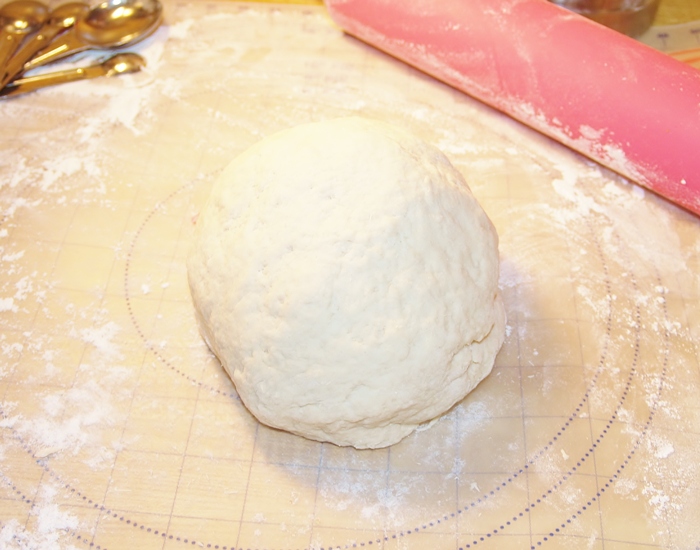
Keep adding water and mixing until a dough ball forms.
On a floured surface, knead dough ball until elastic like this:
Cut ball in half placing one half back in bowl and cover with damp tea towel.
Roll other half into a long rope measuring about 1” in diameter using your hands like this:
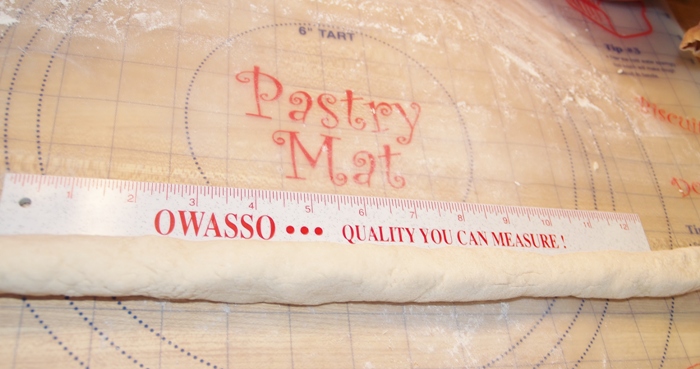
Using a ruler if needed, to cut every ½ inch.
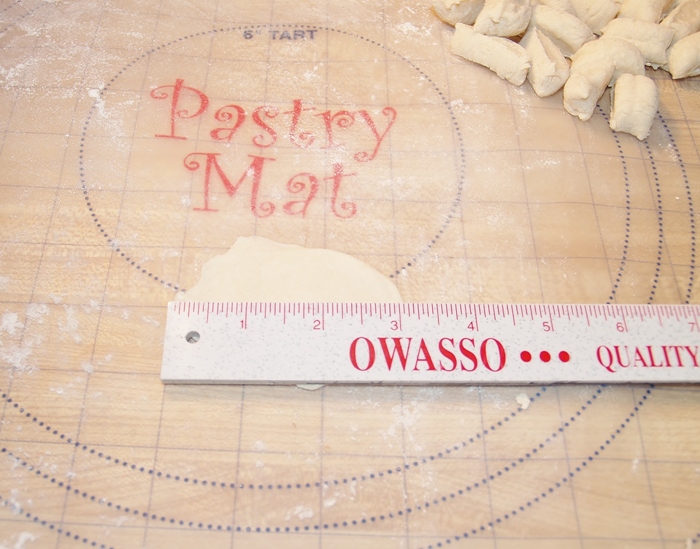
Roll each piece into a ball and then with a floured rolling pin until reaching about 3” in diameter.
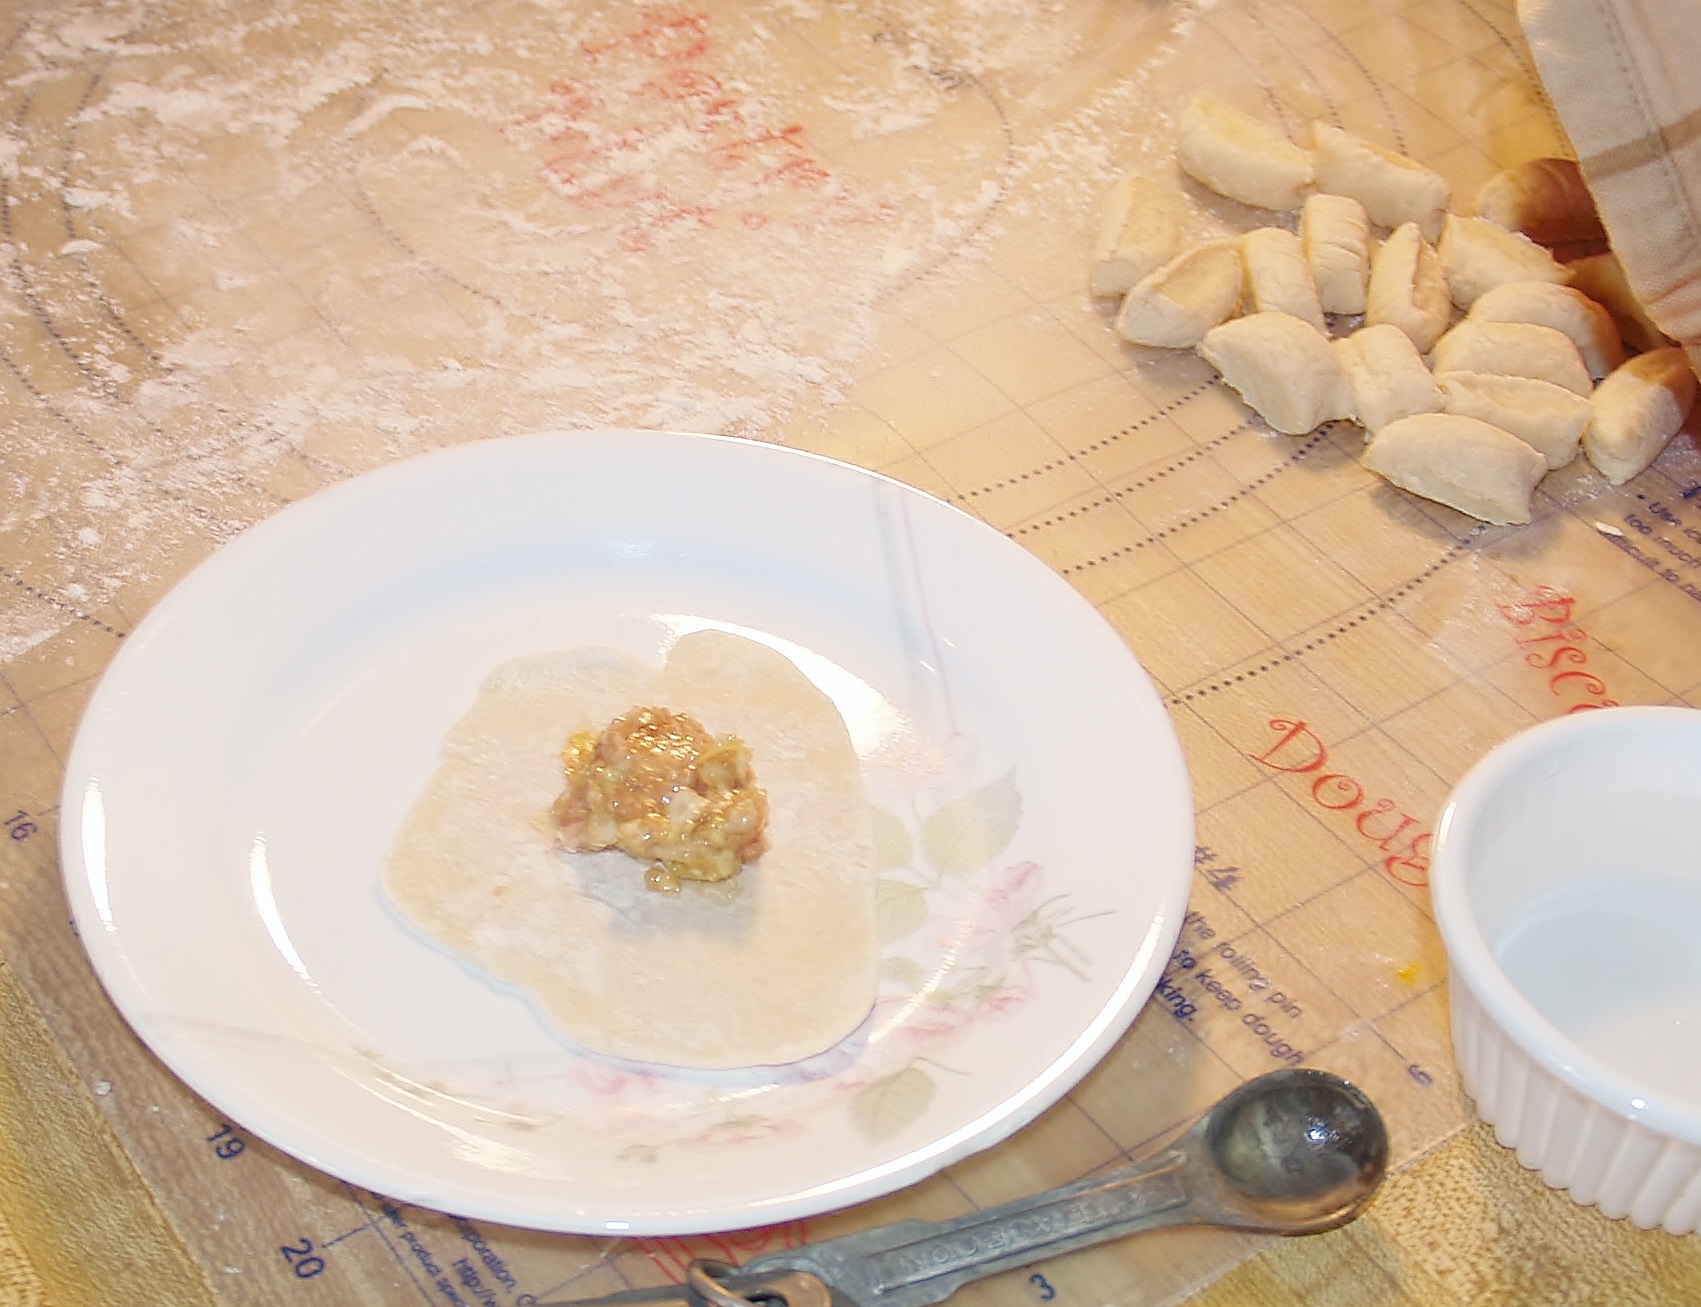
Place ½ teaspoon of pork mixture in very middle being careful not to let mixture touch edges of dough.
Lightly put water around the edges like this:
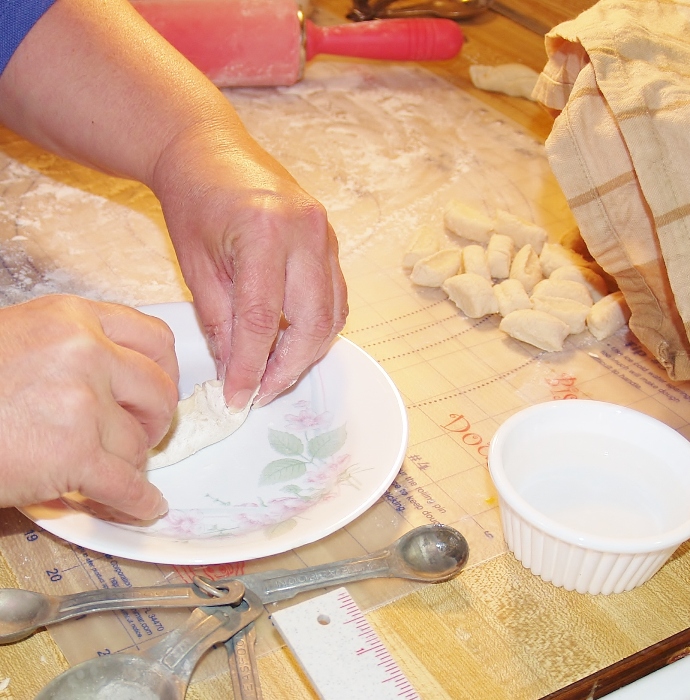
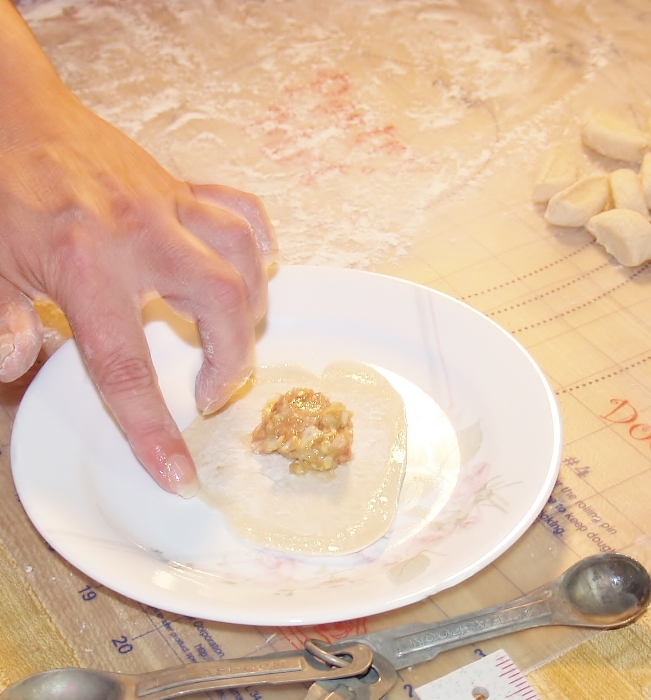
Pick up and make into a purse-like potsticker.
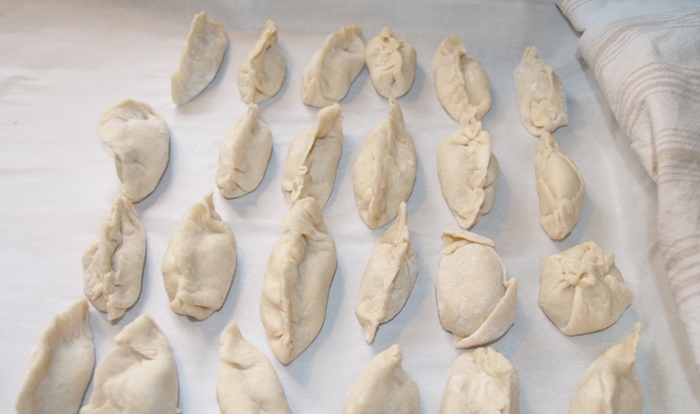
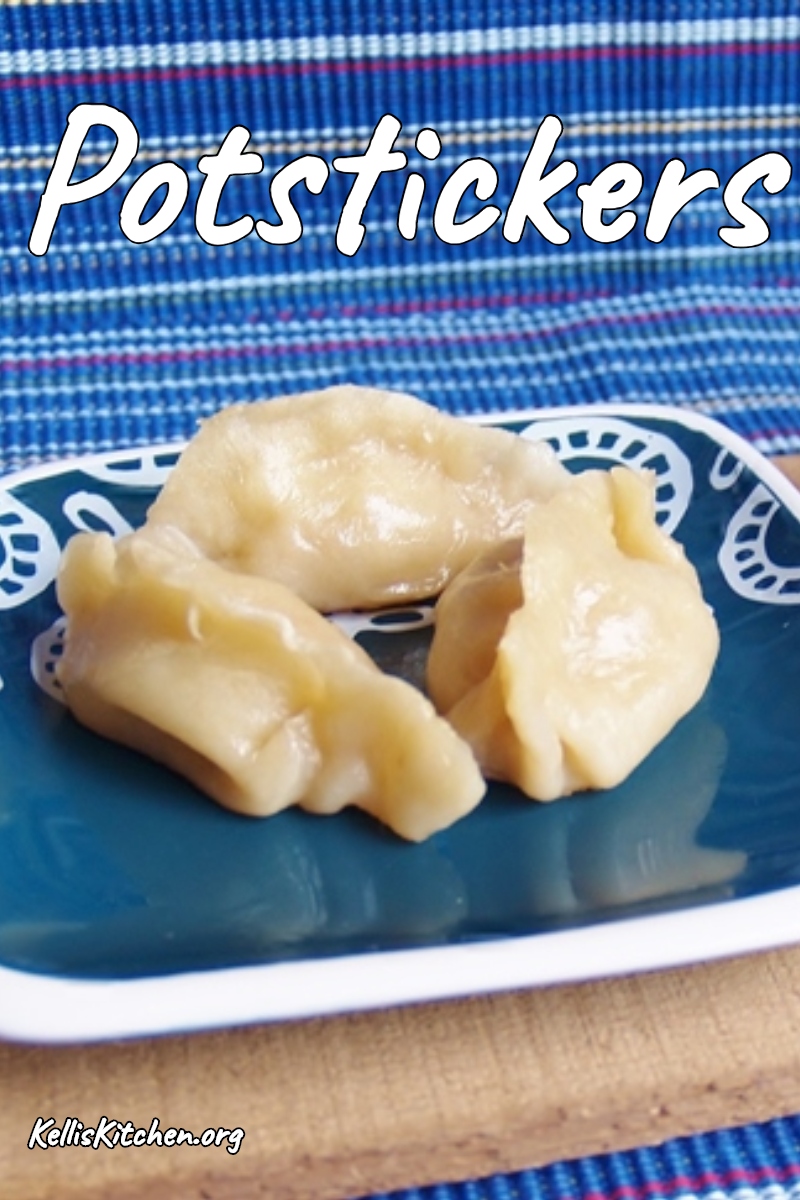
Place on parchment paper sheet pan until all are done – this recipe will make about 6 dozen.
If you plan to freeze – the leave them on the sheet pan and freeze completely then, place in freezer safe container. Or, if you plan to eat them soon—
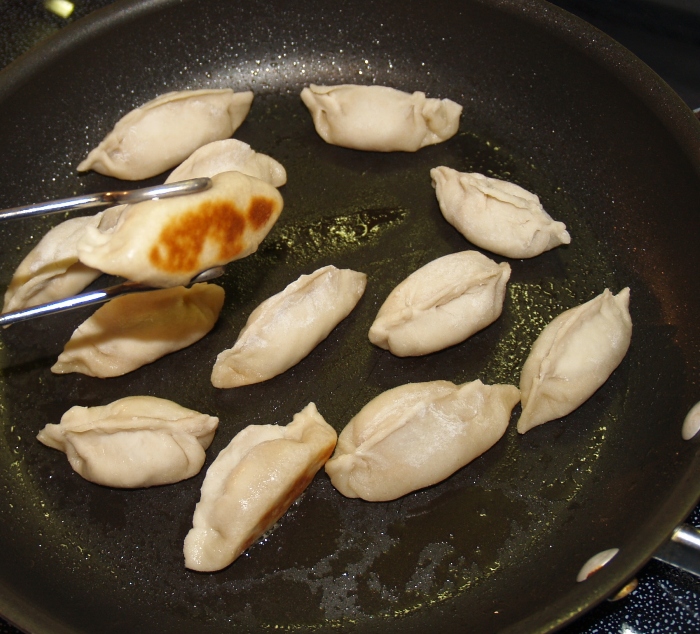
Put some in a non stick skillet sprayed with non stick spray over medium heat until browned on bottom.
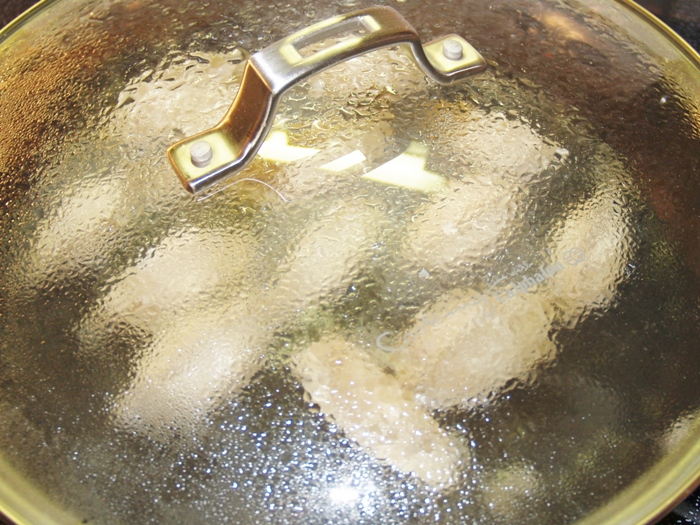
Add 1 cup water and put lid on skillet and cook for 5 minutes:
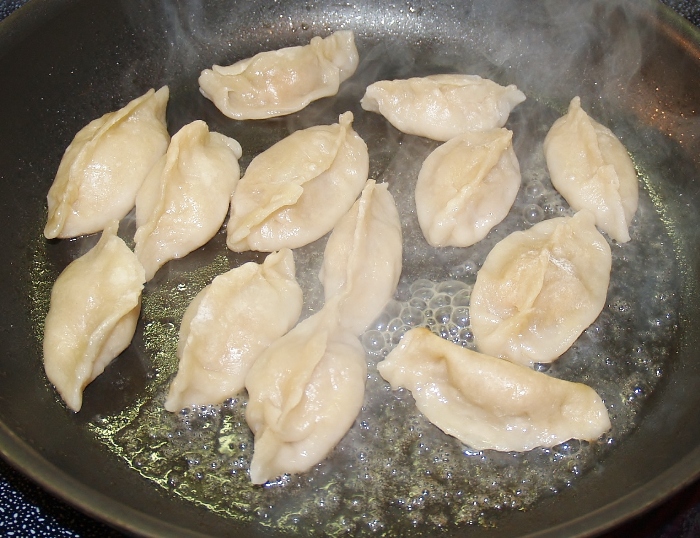
Take lid off and allow all water to cook out – then they are done!
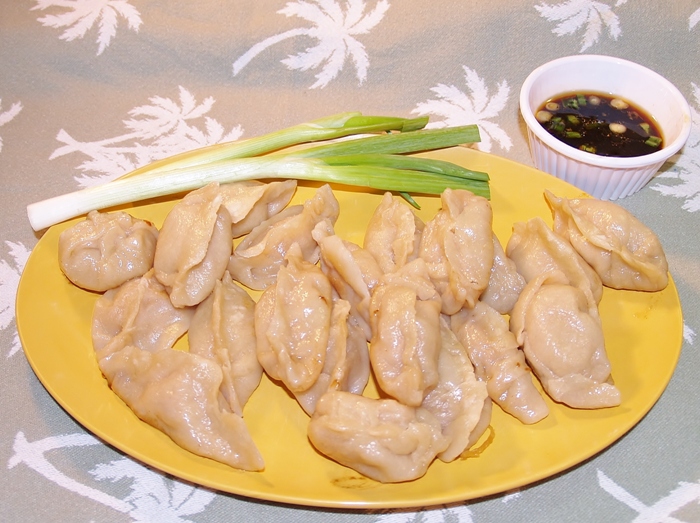
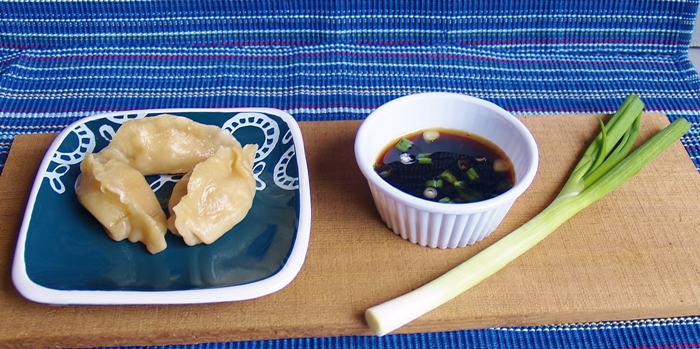
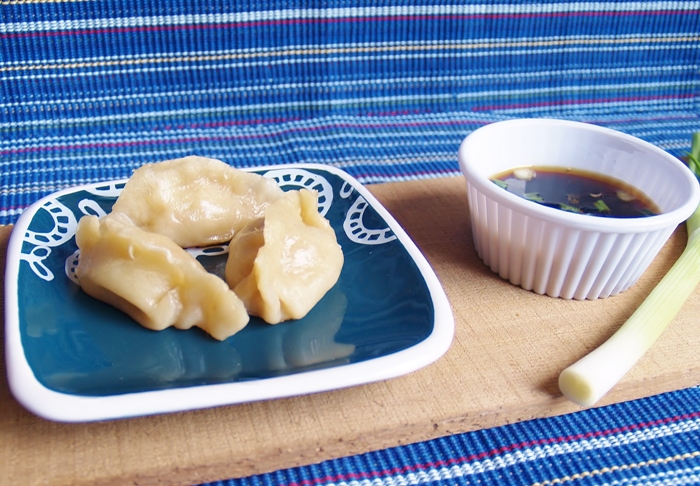
Put on a platter and eat as many as you want! If you want dipping sauce like mine use equal parts rice wine vinegar and soy sauce, add a dash of sesame oil and chopped green onions to bowl. They are delicious!
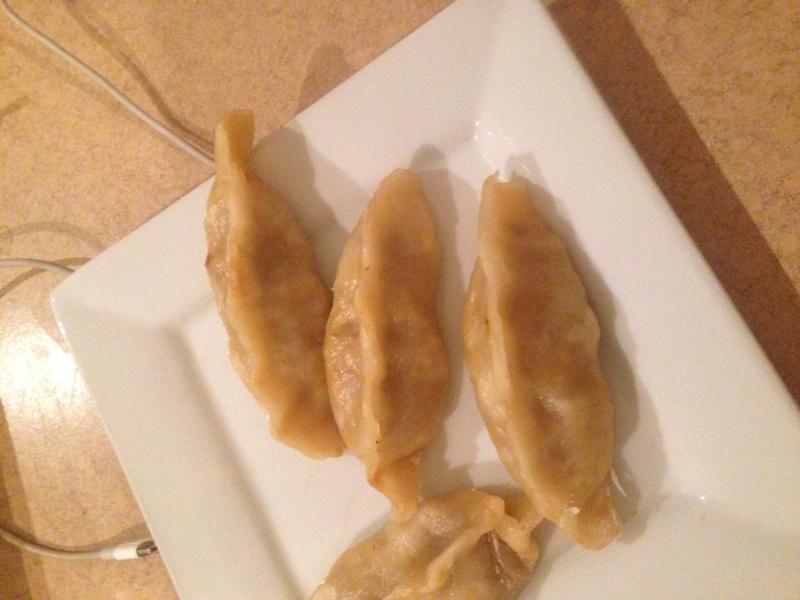
And just look at this! Thalia made some and told me how much she and her husband loved them (and how easy they are to make). See her comment below. She sent me a picture which I am posting here so you can see that it works and it’s so easy! Thanks Thalia!!
I am partying at Weekend Potluck today – come on over!
I have been looking for a easy recipe and this looks like a winner.. will def be trying this out over the weekend. Will send you the pics if they come out like yours 😉
Thalia – thank for dropping by and I can’t wait to see yours when they are complete! You will love them and please come back any time!
So I made these delish babies over the weekend and I tell you AWESOME is an understatement and so easy!! I would love to put a pic up but I can not for some reason, is there any other way to send to you?
Heck yes Thalia – and I will post it on the blog!! send the picture to davidson.kelli@gmail.com and I will get it on as soon as I can. I’m also going to post it to my FB page. I’m thrilled that you loved them………….now I’m thinking I need to nix the pork chops I have planned for tonight and go for more potstickers!!:)
Sounds delish!
Thank you!!
Kudos to you for making your own dough. I just buy the little pre-made wonton skins at the grocery store.
If you ever want to get really adventurous, try making soup dumplings (the secret ingredient is gelatin!).
I will have to rest up about a month after all this but then I will be ready to try it!
what a project! Your persistence is commendable 🙂 Love potstickers and love that you got what you wanted eventually. A lesser woman would have given up and headed to the grocers’ freezer section 😉 Hurrah, Kelli!
I almost did Liz – but I wanted those darn thing so bad! It was worth it!
Yum! And I love your photos with the blue. 🙂
Thanks Beth! They are placemats from Target~! I love ’em and they worked out well for this photo!
I’ve done the pot sticker/dumpling thing a time or four, and they always turn out looking like those clay projects that we made back in kindergarten for Mother’s Day. (I actually made my mom an ash tray, but you get the point.) ~ Yours are beautiful and it looks like you’ve been making them for years. Wow.
Thank you Adam!
I love your determination, Kelli – thanks for making this three times so that we can benefit from your amazing recipe. Your potstickers look perfect! They’re one of my favourite things to eat. I’ve always been too intimidated to make my own but you’re inspiring me.
It was SO worth it!
Thank you for this recipe. I book marked this. I am going to give this a try.
You will love it!!
They look delicious Kelli!! I love potstickers and could eat 6 or 8 in no time flat. You did a great job with the dough, I always have problems making the dough. Nice pictures too 🙂
recent post: Homemade Ice Cream!
http://michaelswoodcraft.wordpress.com/2014/06/23/homemade-churned-ice-cream/
Me too! I love just eating those – yum!
These look yummy!!!
Thank you!
You make it look soooo easy. Nice ruler btw! Glad you were persistent with the recipe and tweaked it enough to share with us!
Ha! I thought you would get a kick out of that – I use it because it’s plastic and I can put it through the dishwasher before and then after I use it.