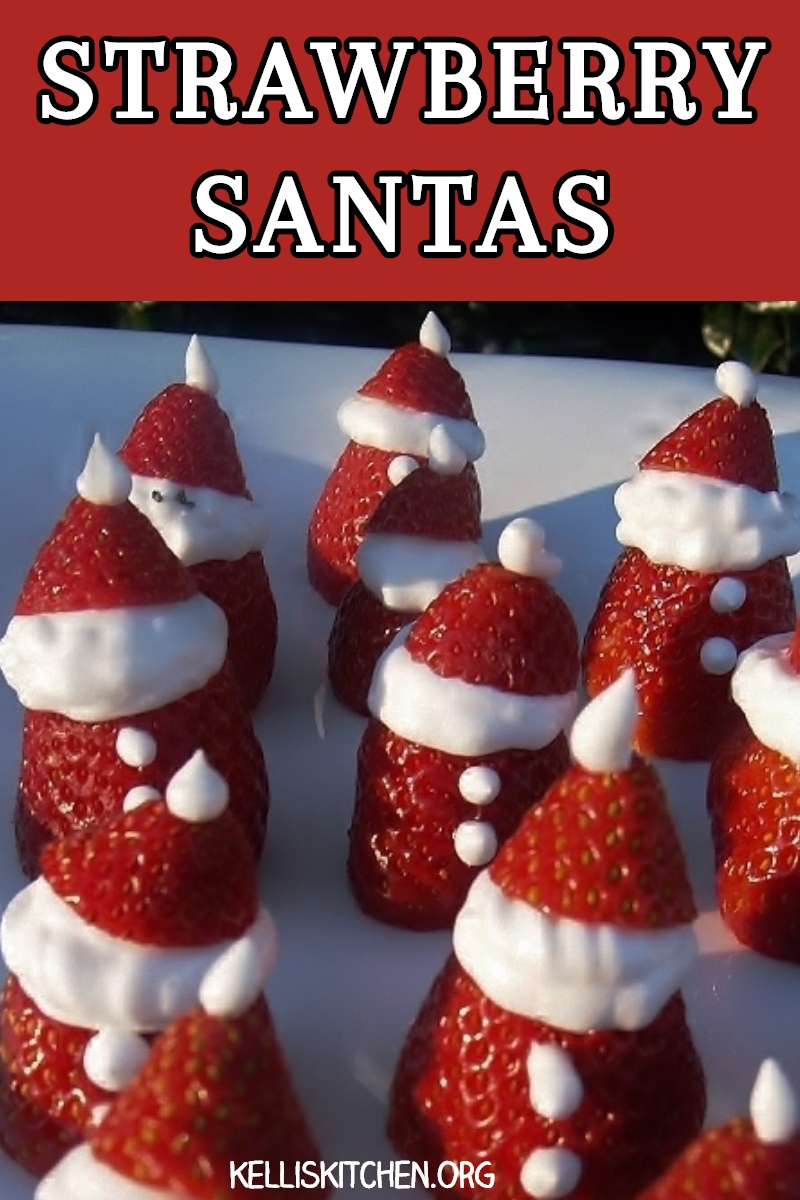
A Facebook friend of mine from high school sent me a picture last week of little strawberry Santa’s and I just knew I had to make them. I searched the Internet for a tutorial or instructions and didn’t find too much. I honestly could only find 2 other posts with them and only one with “ingredients” needed. Armed with that, I made an early trek to the grocery store yesterday morning expecting to find chaos – but even in Wal-Mart, there really weren’t that many people shopping. The picture my friend sent me had little black eyes and the other post I found had none. I thought I would buy poppy seeds and try those – you can see how those turned out down in the post.
What you will need:
1 pound of strawberries
Cool Whip
What you may want:
Something to make eyes for Santa.
First, wash the strawberries and lay them on a paper towel to completely dry.

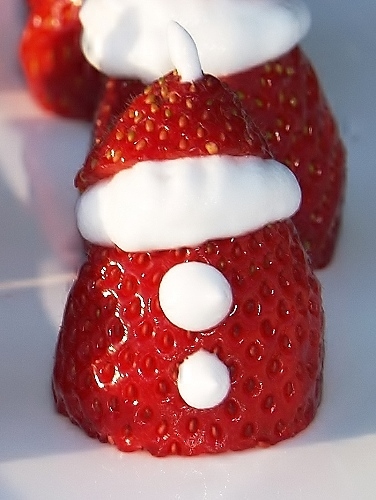
Cut off the stem end so the berry will sit flat.

Cut off the tip of the berry, being careful not to cut off too much or it will become top-heavy. Then core just a little bit out of the tip end because more cool whip is BETTER!

Then you will need a star tip and possibly a round tip. I didn’t have either so I bought this from Wal-Mart for $9 – and it works great!

I practiced a little first since I have never done anything like this with a cookie or anything.

Using the star tip, put a little in the berry as it sits flat. If you put in too much, the “hat” will fall off. Then, taking the round tip put a tip on top of the hat and two little buttons. Here is my first one:

Then I tried eyes with the poppy seeds – Santa looks as though he has eye issues because I didn’t have the patience or steady hand to do it so mine won’t have eyes.
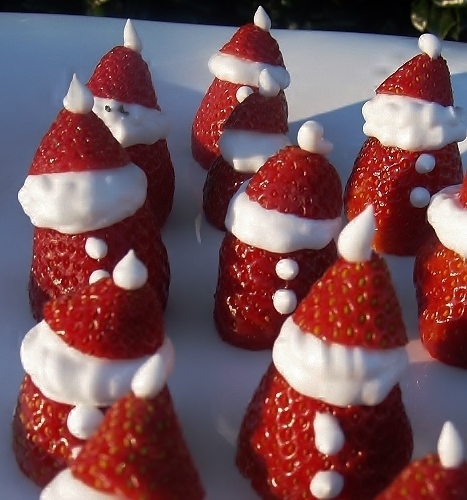
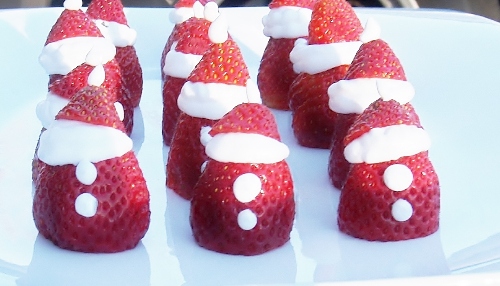
You have to work fast because the tiniest amounts of heat will them to begin melting. So, they aren’t perfect like the ones I saw but I’m really happy with the effort and since they only took 15 minutes and about $6 to make, I can try again and again. They taste GREAT!
.
GAH these are adorable my friend – I was planning to make Santa HAT strawberries this year but this is just as if not more cute 🙂
Cheers
Choc Chip Uru
Thank you – I can’t wait to see your santa hats!
These are adorable!!
Happy Holidays!
Thank you and the same to you!
These are not only adorable, they look delicious! If you want some eyes, try melting a few chocolate chips and use your new round tip, just touch to the face where you want eyes. Or, you could put them on waxed paper and freeze for a few minutes, then put them on the face. Either way, they won’t last, at least not around our house!
What a great idea! I like melting and putting on wax paper in the freezer – because sometimes when I “touch” the face – I take 1/2 of it off! 🙂 I appreciate the compliment AND the tip!
I’m not always real steady handed, so I bought a pair of tweezers specifically for use in the kitchen. They would make this much easier on me, maybe for you, too! And, if your tip is too large, just put some melted choc chips in a sandwich bag, then cut off a very, very small piece of the corner (I mean, TINY) and use that. I did that for years before I ever got any tips and it works just fine.
KellI, I love these, and so much healthier than all the other holiday treats that will be offered up this season!
I make strawberries similar to this and the first time I made them the cool whip was too runny to keep the hats on. To prevent them from “melting”, I blend lite cool whip with 4 oz softened lite cream cheese and a box of sugar free white chocolate pudding. You can play around with the ingredients and flavors, leave out the cream cheese, etc.Vanilla pudding mix is good, too.
Thank yo so much Susan! I had no idea what to do in order to make the filling more……robust……I’m going to make some for a pot luck on Thursday of this week and that’s what I’ll do!
These are so cute. I’m not sure I’m patient enough or steady-handed enough to make them, but I’ll have to try.
Lillian
lillianscupboard.wordpress.com
Simple food art is right up my alley. 🙂 They are so cute. 🙂
Thank you!
These are adorable!!! I think they look cute without eyes 😉 You’re on fire lately!
Thank you – I thought they looked fine without eyes too! 🙂
SOOO incredibly adorable! Thanks for linking up at Weekend Potluck.
Thanks Marsha – always enjoy participating!
Ah simple and effective! My kind of recipe!! lovely work x
Thank you for the compliment and for stopping by! Please come back often!
OH MY GOSH! I can’t wait to try these..even now, a little post-Christmas! Thanks you so much for sharing this 🙂
Thank you for visiting – they are very good and light!
These are so adorably delicious 🙂
Why thank you! And thank you for dropping by – please come again!
Found your blog from Plant Based Diet Adventures! These are totally cute! I love them! Following your blog now 🙂
Thank you! I really enjoyed making those and eating them! They also won a contest at work…..Thank you for following, coming to check out your blog now.
Oh how cute!!!
Thank you Renee!
These are SO stinkin’ adorable, Kelli! SUPER easy craft to get kids involved with, too.
Thanks Becca – they are not hard at all!