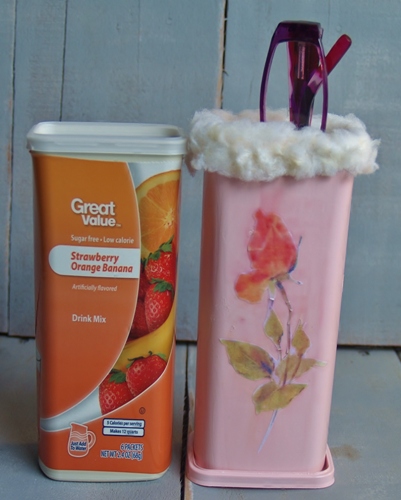
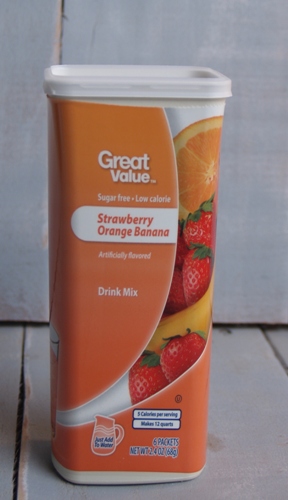
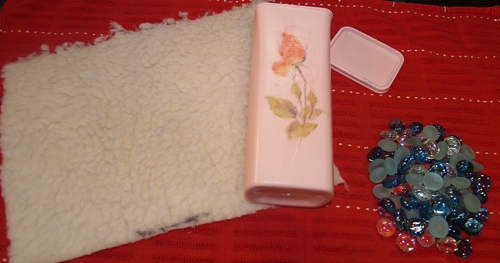
My friend from work, Jennifer, brought this Great Value drink mix container to me and asked if I thought I could do anything with it. I had to think on it for a while but then – it hit me – I needed several reading glass holders thorughout the house and also at the office. Why? Because I either cannot accept or get used to wearing reading glasses. I guess I don’t like getting older too much. Anyway, it was all pretty easy and you can do it to.
First, you start with the container – cut off the wrapper and run it through the dishwasher or wash it really well.
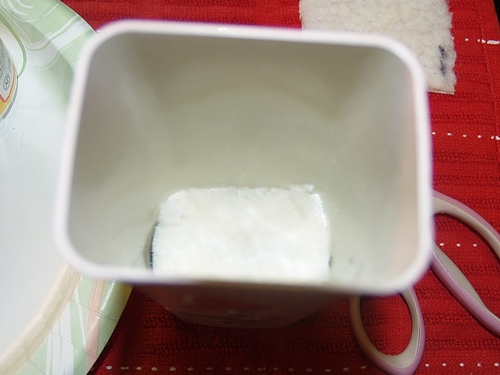
You will need something to weigh it down – I used part of a bag of that tumbled glass you can get at Michael’s. I had some left over from another project.
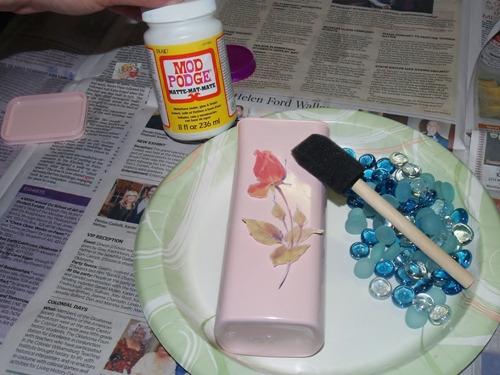
Then I went to my favorite graphic place – Graphics Fairy – and found that pretty picture of a rose. I copied it off and cut it out.
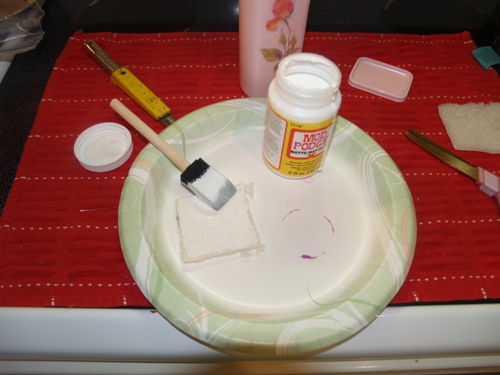
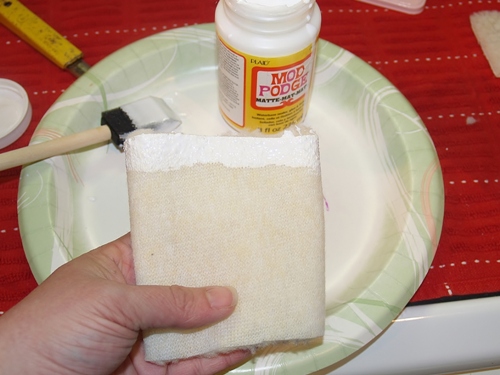
I sprayed Primer for Plastics on the outside and then after it dried, I spray painted it pink. Using Mod Podge, I put it on the front and covered the entire thing with Mod Podge.
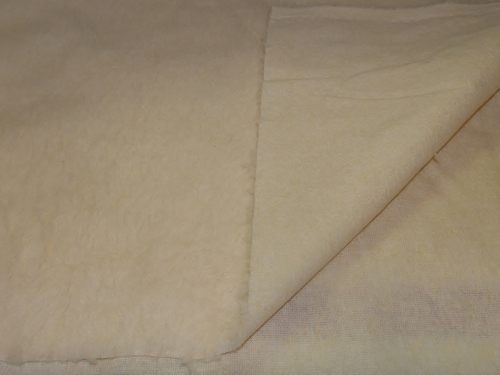
I had this fabric from when Rocket was a baby – I got it at Hancock Fabrics but I am sure you can get it at any fabric store.
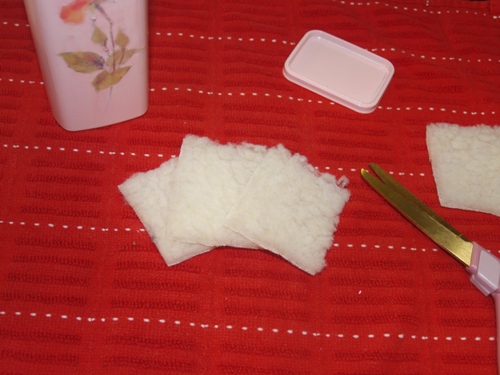
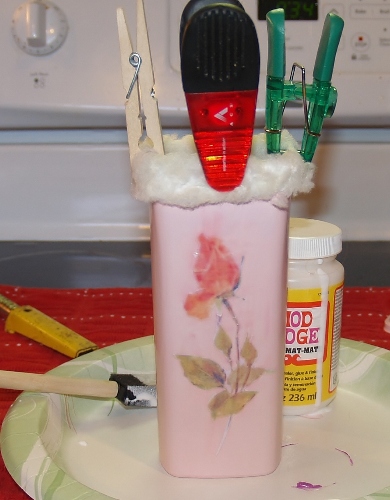
Now it’s time to put it all together. I cut out three small pieces and after putting the tumbled glass in the bottom, I put three pieces of the pile fabric in it.
I used Mod Podge on the first piece I put down so it would stay glued onto the glass and then put the other two on top.
See? You need to put that in first and it fits really nicely.
Measure the fabric so it will fit all the way around.
Then measure how long it should be. You may have to trim around both of them to make them fit right.
Put Mod Podge around the top rim of the fabric then fit it back in.
I used some clothespins and chip clips to hold it down till it dried.
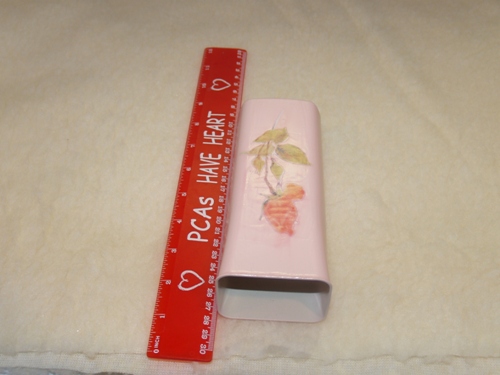
And then it was done! The colors ran a bit but I like it that way – I think it makes it look like water colors.
I’ve got my reading glasses in them right now!


http://sparklesandastove.com/things-pretty-linky-party-48-features/
I wear glasses all the time but use readers for the computer. This would look so nice on my computer desk and I wouldn’t have to grope around for my glasses. Good idea.
Lillian
Thank you Lillian!
This is so cute and such a great idea 😀
My glasses case is so boring!
Cheers
Choc Chip Uru
I love how retro this looks! 🙂
Thank you!!
Great idea, will share with my quilting friends, most of us wear glasses. Have one by my bed so I can easily find
my glasses first thing.!
Thanks Linda! I can’t see well at all anymore. I feel your pain! 🙂
This is so cute. Too bad I don’t wear glasses. Trinity and Daniel do, though… they’re blind without theirs, but maybe they could use something like this on their bedside table?
Sure but this one has old lady roses on it and I don’t think either of them would like that! 🙂
Brilliant! And you made it look easy enough that I’m actually considering trying to duplicate your success!
Yay! I hope you do and when you do – please show us!
This turned out so amazing…love the color and the rose. I have some more to bring to you so you can make quite a collection of them 🙂
Thanks Jennifer! I really enjoyed making it and I find it incredibly useful!
I have an empty Crystal light beverage container that’s empty but it’s the smaller size..I just put my eye glasses in it and realize they just fit so there’s no room for any kind of weight at the bottom or not even a liner. Will have to buy the larger size of CL and try it because it would be perfect. Probably wouldn’t need a liner ..Will have to look around and see if there’s something else that I have in the house that could be repurposed and recycled for this eye glass holder. I’m almost blind without my glasses too..sometimes I think they help me hear better! LOL!
Hi Betty! Yes, mine always help me hear better too! I bet you find something that works perfectly for you and when it’s done, I hope you will share it with us all! I can’t wait to see it.
Thanks Kelli! I love crafty DIY stuff! I was searching for a product to buy, but I found your page and got inspired! Within an hour, I had a container covered in contact paper, lined with thin foam, and weighted with rocks from the front yard (tucked in pouch)! It’s awesome! 😁