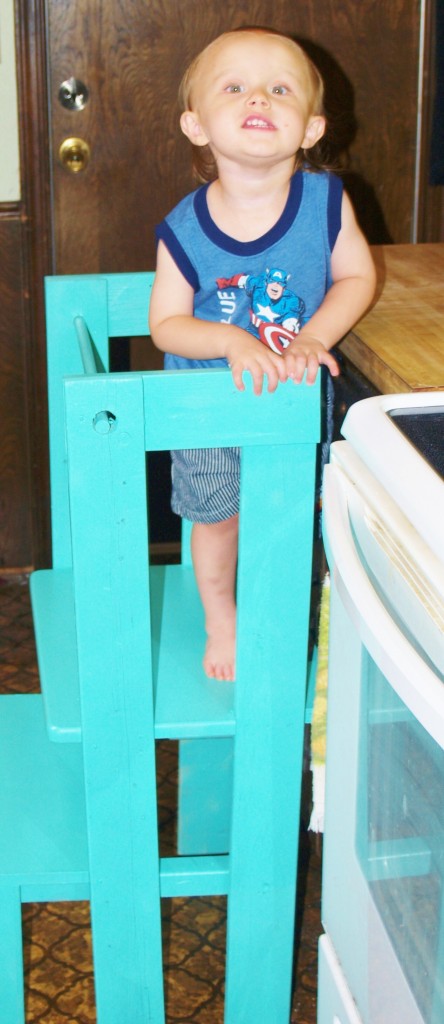
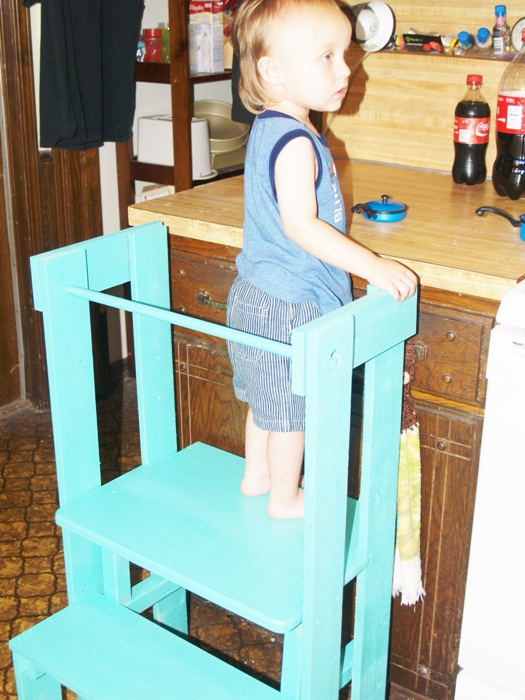
Rocket loves to “help” in the kitchen. If one of us goes in there for anything at all, he is always not far behind dragging one of his Little Tikes plastic chairs so he can stand on it to be closer to the counter. While those chairs are great for sitting, they are very unstable for standing on. Discouraging him from standing on a chair in the kitchen usually brings on an upset little boy. His mother and dad bought him little plastic pots and pans and some plastic food thinking that would suffice, but they were wrong. He wants to be up where the action is!
I began looking on Pinterest for something that someone…..anyone had built for their own child. I found something called an Activity or Learning Tower for the Montessori program on Amazon. The costs for them started at $119 through $199. All were very large and heavy. In fact, for someone who does not have an open style kitchen/living area it would block a big part of the floor space, particularly in a galley style kitchen like mine. Eventually I found one that someone had made using an Ikea Beckvam step stool. The step stool cost $14.99 but because the closest Ikea store to me was 2 hours away, shipping and handling brought that cost to about $25.00. That was more than I wanted to spend on part of the stand so I kept looking and talking with my husband about it. I just knew there was something we could put together for less than $20 that would be lighter weight yet stable for him to stand on and reach the table or the Kingston cabinetry. I was right!
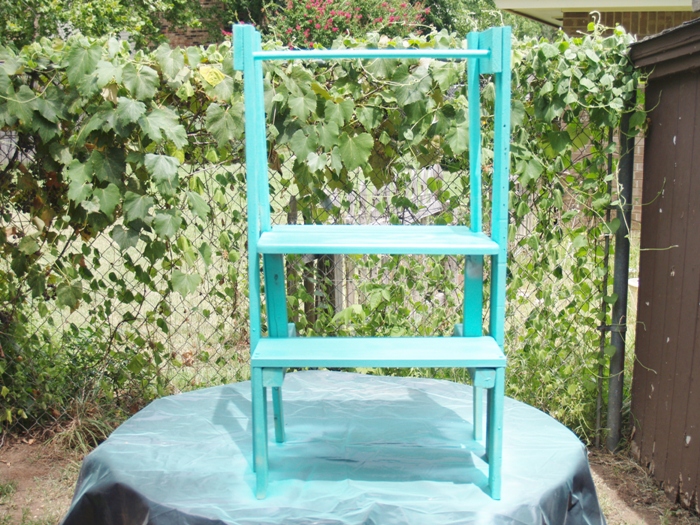
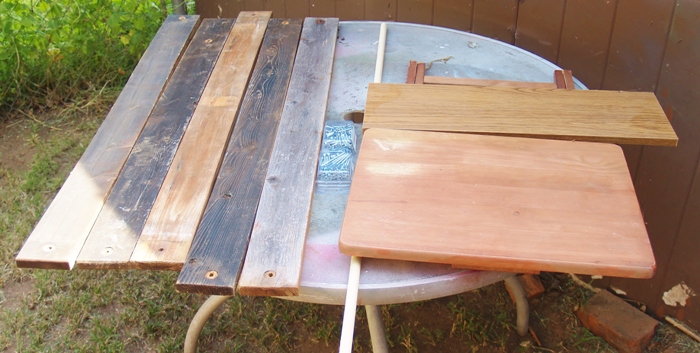
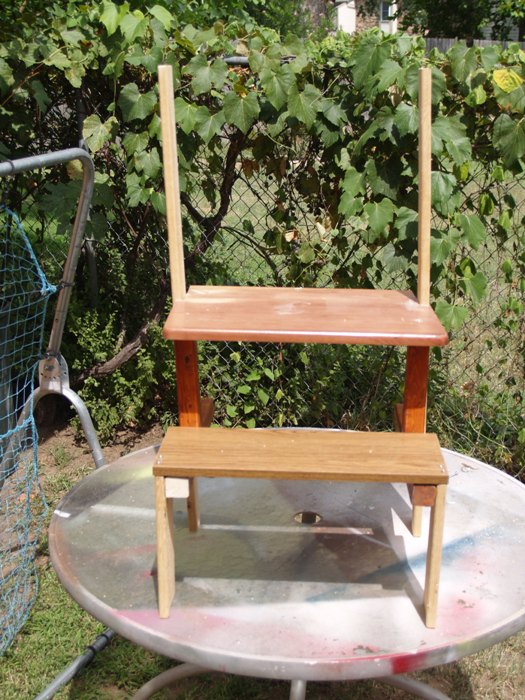
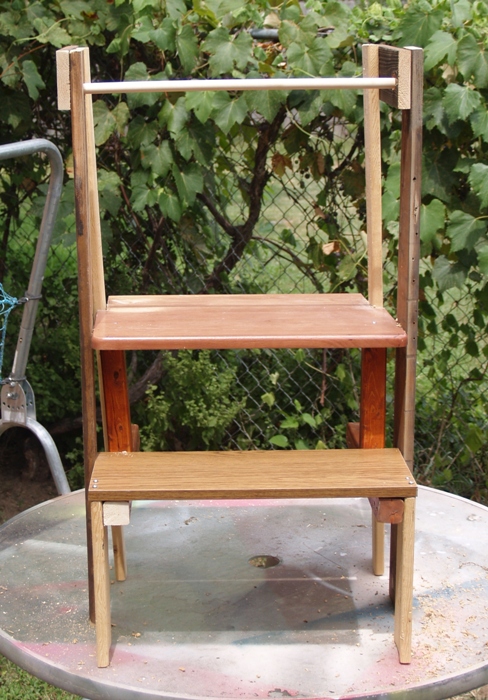
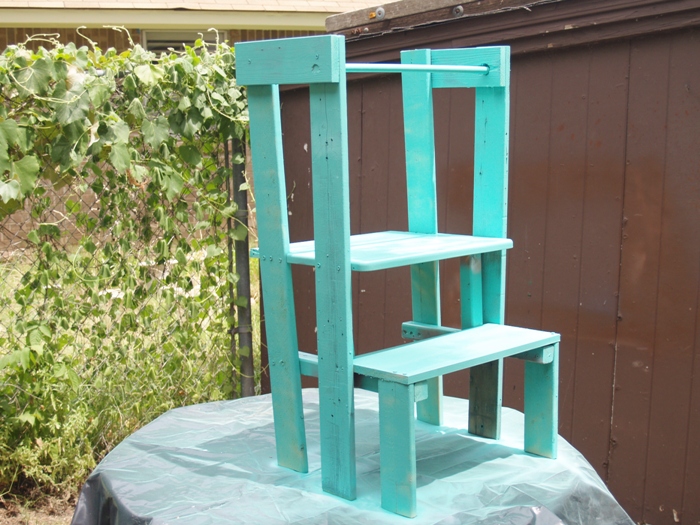
I have put together the tools and items you will need to make a stand like this one –telling you what we used and you can too if you have them but if not, take the list to the lumber store and get what you need. Ours ended up costing less than $15 because we recycled scrap wood, a book shelf and a wooden TV tray. Hopefully, you will have them too! By the way, the stand is VERY stable and weighs 12 pounds.
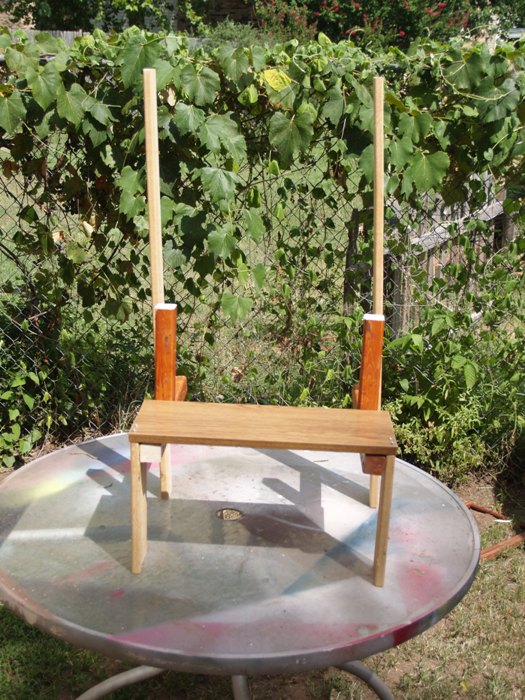
The most interesting part is that if you turn the stand around, adults can sit on it like a stool – an added bonus we did not anticipate! The stool seats an adult level with the Little Tikes table and makes it very easy to sit and play or color with your child. This picture is the back side where the dowel is, but on the other side is no dowel and you can use it as a seat!
Kitchen Helper Stand
Tools, Paint and Hardware:
Drill
Phillips Bit
5/8” Boring Bit
Chop or Circular Saw
Sander (a palm sander is good – or sand paper and elbow grease)
Jig Saw
Tape Measure
#8 one and a half inch wood screws (you have to buy a box of these for about $5 each box)
#8 two inch wood screws (box)
#8 two and a half inch wood screws (box)
1 Can Krylon Primer
2 Cans Krylon Sea Glass Satin Finish Spray Paint
Wood – New or Recycled:
4 – 1×4’s 36” Long
2 – 1×4’s 11” Long
2 – 1×4’s 10and1/2” Long
1 – 19x8x1 (we used a recycled shelf)
1 – 19x14and1/2 (we used an old wooden TV tray)
1 – 2x2x8 – cut two 16 and ½“pieces and two 8” pieces
1 – 5/8” wooden dowel Cut to 21 ½” long
Directions:
- Cut all wood to size.
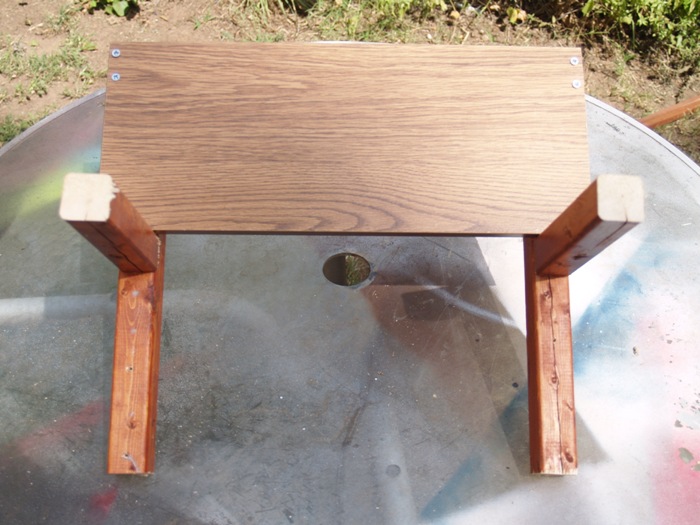
- Attach 10 & 1/2” 1×4’s to the 19x8x1 (bookshelf)
- Attach 16 ½” 2×2’s to underside of 19x8x1 (bookshelf) front inside the legs.
- Attach 8” 2×2’s to the 161/2” 2×2’s butting up against the 19x8x1 (bookshelf).
5. Cut a ¾” by 5 ½” notch in the 19×14 ½” (TV tray) in the back of tray piece.
- Attach two 1×4’s (36” long) to the back end of the 2×2” (16 ½” long ones).
- Place notched end of 19x8x1 (TV tray) inside the two 1×4’s (36”) and on top of the 2x2x8 (8”).
- Screw TV tray piece down into the 2x2x8 pieces then screw into the side of the TV Tray piece through the 1×4 (36”).
- Attach other 1×4 (36” pieces) to the side of TV Tray piece about 1 ½” back from front.
- Added the two 1×4 (11” pieces) to the outside top of the 36” board pieces.
- Screw into place both front and back for security.
- Mark a spot 2” back from front edge of the 11” 1×4’s and drill holes using the boring bit on both sides.
- Insert dowel through holes.
- Screw in dowel to the 36” pieces using 2 ½” wood screws.
- Prime and then paint it allowing for at least 1 hour drying time between each.
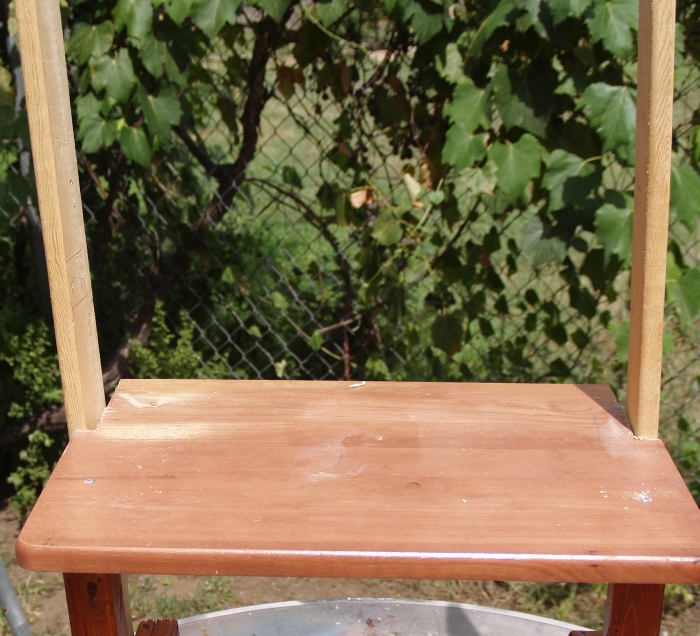
After only 1 coat of paint…..
***Some of our pieces were irregular because we reused salvaged wood instead of having brand new pieces. ***
I hope this works for you as well as it worked for us – our grandson loves his Helping Stand and now I feel secure letting him help – and the Son-in-Law enjoys sitting on it to play “zoo” at Rocket’s table because he did not enjoy the floor much!
Actually, I could use one of these myself! And the added seat would be a bonus. Thanks for posting this great idea!
I’m glad you can use it too!
How creative!! Rocket looks so happy and ready to help!
Thanks! He’s always ready to help!
This is a wonderful idea. When i was Rocket’s age, I stood on a dining room chair, hanging onto the back of it, to watch my mom wash dishes. I leaned too far and tipped the chair and myself smack onto the floor. I bit my lower lip so hard that I still have a flap of tissue sticking out there that I bite from time to time when it gets in the way. Obviously I should have gotten stitches back then, but it was the 1950’s and people didn’t think of things like that, even if they could have afforded the fee. I don’t want this kind of thing to happen to any other children.
P.S. I’m finally getting it removed on Friday. I’ll call it an early 60th birthday present!
Yay! I’m happy you are giving yourself a special birthday present! Honestly, my mom didn’t cook much and I had no interest in watching her cook but when I was at my Nana’s – she would tell me stories (that I have shared on the blog) while she was cooking something – so I stood on her dining room chair – it was one of those 50’s sets that had the fabulous Formica table with it? Her’s was brown with gold flecks in it and the backs of the chairs had gold “rope” that formed a heart for each seat back. Of course, I always stood in the car when I was a kid and my mom’s right arm was my seatbelt! 🙂
Rocket is absolutely adorable! And his hair!!!!!
Thank you – yep he finally has hair in the back…….maybe one day in the front too! :)Always good to hear from you!
Wow that is such a good idea 😀
Love the colourful touch you gave it too!
Cheers
Choc Chip Uru
Thanks! My daughter chose that color – it’s really bright!
Practical, perfect solution, Kelli! He’s a cutie-patootie, too!
Thanks Debra! You are on the countdown now, aren’t you? Some schools start over here on Tuesday I think.
That is really clever. My grand kids are now big enough to really help. Thanks for sharing.
Glad to see you here!
I made this for my curious 2 year old. He loves it and uses it often. Thanks for the plans
That’s wonderful! I think the great thing is that our grandson used it as a “desk” too! Now he’s too big for it but it’s in the attic in case we have any more grandchildren! Thanks for letting me know how much you liked it!